Resizing a too small /boot partition

One of my oldest servers has been through many upgrades, from Debian Wheezy (7) all the way through Debian Bookworm (12). Along the way the original 256MiB /boot partition got a little tight and eventually it got to the point where I could no longer upgrade the kernel.

The system has two boot drives, each with 2 partitions in Linux-MD mirrors, the first partitions for the boot mirror and the 2nd partitions for the OS drive Crypto/LVM. 

$ fdisk -l /dev/sda
Device Boot Start End Sectors Size Id Type
/dev/sda1 * 2048 499711 497664 243M fd Linux raid autodetect
/dev/sda2 499712 125044735 124545024 59.4G fd Linux raid autodetect

$ lsblk /dev/sda
NAME                        MAJ:MIN RM   SIZE RO TYPE  MOUNTPOINTS
sda                           8:0    0  59.6G  0 disk  
├─sda1                        8:1    0   243M  0 part  
│ └─md0                       9:0    0 242.8M  0 raid1 /boot
└─sda2                        8:2    0  59.4G  0 part  
  └─md1                       9:1    0  58.4G  0 raid1 
    └─md1_crypt             253:14   0  58.4G  0 crypt 
      ├─stora_vg-root_lv    253:15   0  14.3G  0 lvm   /
      └─stora_vg-swap       253:16   0  11.2G  0 lvm   [SWAP]

$ mdadm --detail /dev/md1
/dev/md1:
           Version : 1.2
     Creation Time : Thu Mar  7 08:29:14 2019
        Raid Level : raid1
        Array Size : 61262848 (58.42 GiB 62.73 GB)
     Used Dev Size : 61262848 (58.42 GiB 62.73 GB)
      Raid Devices : 2
     Total Devices : 2
       Persistence : Superblock is persistent

       Update Time : Mon Jul 10 18:33:08 2023
             State : clean
    Active Devices : 2
   Working Devices : 2
    Failed Devices : 0 
     Spare Devices : 0

Consistency Policy : resync

              Name : server:1
              UUID : 175fc546:57d222bf:b7e667c4:2c489708
            Events : 1666

    Number   Major   Minor   RaidDevice State
       0       8        2        0      active sync   /dev/sda2
       1       8       18        1      active sync   /dev/sdb2

$ pvs
  PV                    VG       Fmt  Attr PSize  PFree 
  /dev/mapper/md1_crypt server_vg lvm2 a--  58.42g 32.93g

$ lvs
  LV      VG       Attr       LSize   Pool Origin Data%  Meta%  Move Log Cpy%Sync Convert
  root_lv server_vg -wi-ao----  14.31g                                                    
  swap    server_vg -wi-ao---- <11.18g

$ cryptsetup status  md1_crypt
/dev/mapper/md1_crypt is active and is in use.
  type:    LUKS1
  cipher:  aes-xts-plain64
  keysize: 512 bits
  key location: dm-crypt
  device:  /dev/md1
  sector size:  512
  offset:  4096 sectors
  size:    122521600 sectors
  mode:    read/write
  flags:   discards 

The end goal of today project was to decrease sda2 and increase sda1, to get there however the all children of sda2 had to be shrunk to allow it to be resized: the crypt container has to be shrunk, then the md has to be shrunk and then the partitions can be recreated. We have enough unused space so we will be subtracting 15GiB or about 31457280(15 * 1024 * 1024 * 2) 512-byte sectors reducing 122521600 to 91064320 512-byte sectors.

The linux-md uses 1024-byte sectors and would  be resized from 61262848 down to 45534208.

$ cryptsetup resize md1_crypt -b 91064320
$ pvresize /dev/mapper/md1_crypt
$ mdadm --grow --size=45534208 /dev/md1

Now we will remove the drive partitions from linux-md, re-partition the drives and re-add them.

$ mdadm --fail /dev/md1 /dev/sda2
$ mdadm --fail /dev/md0 /dev/sda1
$ mdadm --remove /dev/md1 /dev/sda2
$ mdadm --remove /dev/md0 /dev/sda1
$ wipefs -a /dev/sda
$ fdisk /dev/sda
$ fdisk -l /dev/sda
Device     Boot   Start       End   Sectors  Size Id Type
/dev/sda1          2048   4196351   4194304    2G fd Linux raid autodetect
/dev/sda2       4196352 125045423 120849072 57.6G fd Linux raid autodetect
$ mdadm --add /dev/md0 /dev/sda1
$ mdadm --add /dev/md1 /dev/sda2

Once re-added and and the linux-md is synced we repeat the process with sdb. Once sdb had the same treatment we can resize the linux-md arrays and children to utilize all the space again

$ mdadm --grow /dev/md0 -z max
$ mdadm --grow /dev/md1 -z max
$ resize2fs /dev/md0
$ pvresize /dev/mapper/md1_crypt
$ cryptsetup resize md1_crypt

Finally we need reinstall the boot loader that may have gotten clobbered by the repartitioning

$ grub-install /dev/sdb
$ grub-install /dev/sda
Fixing Dell LCC Updates

All new Dell servers come with a Lifecycle Controller, the LCC, which is a way to do offline firmware updates. Reboot the system into the Lifecycle Controller by pressing F10 and you can then have it do search for and update firmware as necessary.

The firmware update tool does this by download a manifest which contains information and links to the actual download files. However this file contains bad links causing the Lifecycle Controller to throw a cryptic error: SUP0531

The reason is that the manifest contains bad links that has an extra string and shows ‘ftp://143.166.147.76//downloads.dell.com/…”, the ‘downloads.dell.com’ part is what causes it to fail, remove it and the paths are correct.

One way to fix the the problem is to use a proxy that will dynamically correct the URL, squid can do this by the use of a redirect_program such as this one, it will simply rewrite the URL without the download.dell.com part and make it so that the LCC can download and install the updates

#!/usr/bin/perl
use strict;
use warnings;

# Turn off buffering to STDOUT
$| = 1;

my $logfile = '/var/log/squid/dellfixer.log';

open ( my $fh, '>', $logfile ) or die "Could not open logfile '$logfile' $!";

# Read from STDIN
while (<>) {
    
    my @elems = split; # splits $_ on whitespace by default
    
    # The URL is the first whitespace-separated element.
    my $url = $elems[0];

    if ( $url =~ m#^ftp://143\.166\.147\.76//downloads\.dell\.com(/.*)?#i) {
        $url = "ftp://143.166.147.76${1}";
	print $fh $url . "\n";
        print "$url\n";
    }
    else {
        
        # Unmodified URL
        print "$url\n";
        
    }
}

close $fh;

Dealing with bad CPE

Sometimes you cannot pick your ISPs or the equipment they deploy. My ISP (USInternet) is great, but the Customer Premise Equipment(CPE) they deploy leaves something to be desired.

For one, they do not support IPv6, this is 2019 and IPv6 should be required for any new deployments and to make matters worse the CPE is completely locked down and the DHCP server only provides RFC1918 addresses, in this case 192.168.30.0/24. If you want to run your own services on your network you end up having to either live with the DHCP server or double-NAT, and i opted for a third choice. Blocking DHCP and running my own DHCP server.

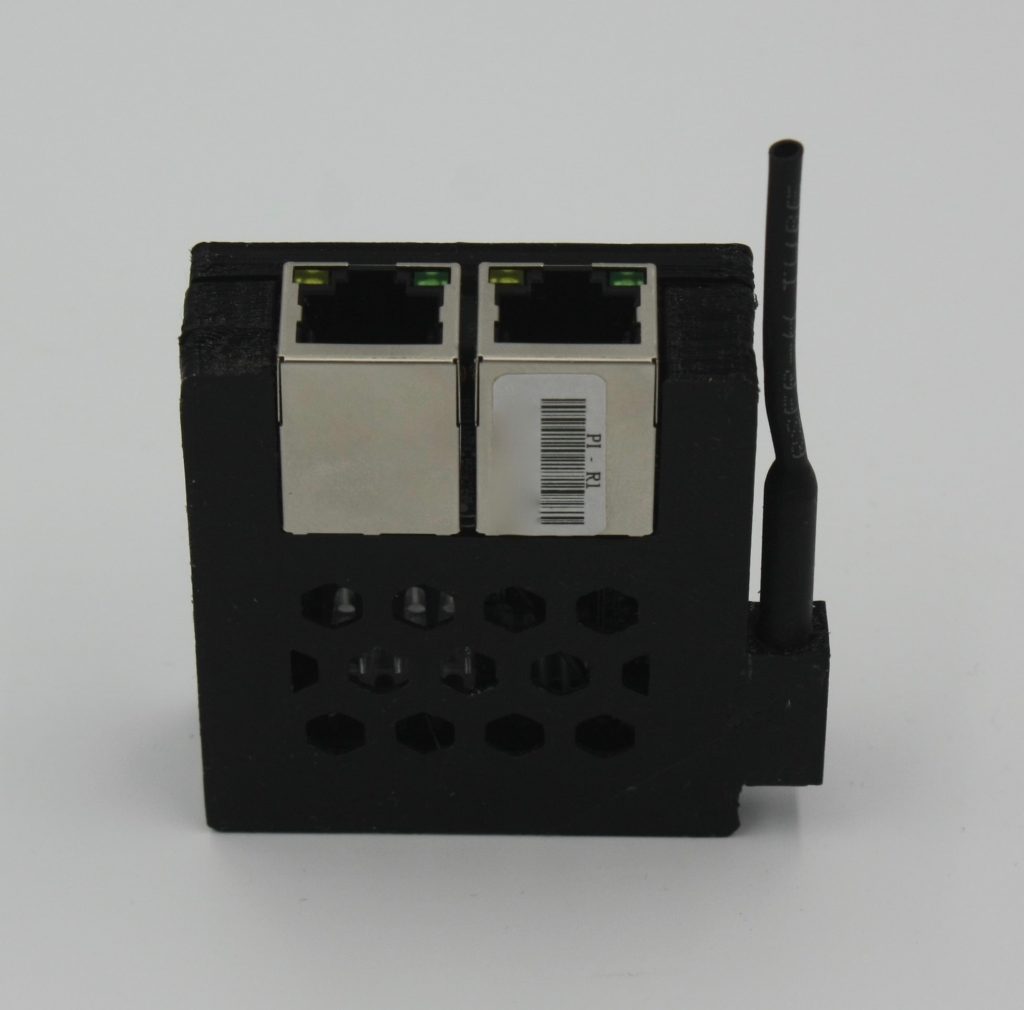
Enter the Orange PI R1, a Chinese Raspberry PI knock-off that comes with 2x NICs and WiFI. I could have used a standard RPi with a USB NIC or some other system with dual-nics but I wanted something that is fanless and reliable.

You will need a microSD card, I had a 2GB card in my junk pile, a 3d printed case like this one that a coworker kindly printed out, and a microUSB power supply, turns out that the OrangePI is a little finicky so get a good quality 1A supply. I also added heatsinks because another coworker had some handy.

I’m a Debian person, so I went with armbian-stretch for the Orange PI R1, copy it to the microSD, assemble your Orange PI R1. The first boot you will need to be plugged into the network with an ethernet cable and be able to find out the IP address assigned. The primary MAC address is stickered on the jack.

Fully assembled Orange Pi R1 in a black case on a white background
Fully assembled Orange Pi R1

ssh in as root (password: 1234) and follow the instructions to change the root password and create an unprivileged account. Login again with the unprivileged account and sudo /usr/bin/armbian-config to configure the wireless interface. This step is optional but highly recommended if you ever want to access your Orange PI R1 later in life. Make sure you are able to ssh in over WiFi before proceeding. It cannot hurt update and install the necessary bridging software.

$ sudo apt update
$ sudo apt upgrade
$ sudo apt install ebtables bridge-utils

Now comes the fun part, you will need to know the names of the NICs on your Orange PI R1, use ‘ip link’ to see the network interfaces. the main one is probably just eth0, the 2nd one will have a funny name like ‘enxc0853ghha5f9’. It really does not matter which is which. create a file /etc/network/interfaces.d/bridge with the following information:

iface enxc0853ghha5f9 inet manual

iface eth0 inet manual

auto br0
 iface br0 inet manual
     bridge_ports eth0 enxc0853ghha5f9
     bridge_stp off
     bridge_waitport 0
     bridge_fd 0

and reboot, you are not done yet to but you are ready to test the bridge. plug it in between your CPE and the rest of your network. everything should work as before.

Now we want to filter out DHCP requests and answers, you will use ebtables which is like iptables but on a lower level. we are going to filter out both ports 67 and 68 in either direction so that the bridge can be used whichever port you plug the uplink into.

$ sudo ebtables -A FORWARD -p IPv4 -i eth0 --ip-proto udp --ip-dport 67 -j DROP
$ sudo ebtables -A FORWARD -p IPv4 -i enxc0853ghha5f9 --ip-proto udp --dport 67 -j DROP
$ sudo ebtables -A FORWARD -p IPv4 -i eth0 --ip-proto udp --ip-dport 68 -j DROP
$ sudo ebtables -A FORWARD -p IPv4 -i enxc0853ghha5f9 --ip-proto udp --dport 68 -j DROP
$ sudo service ebtables save

Testing WordPress

This is a test post. So far WordPress deals with the reverse apache proxy better than b2evolution did.


$ command line text